Showing posts with label experiments. Show all posts

Thursday, February 27, 2014

A Benediction of Rain


We owe a mighty vote of thanks to all the folks who were praying for rain. Two storms, one yesterday, another due in tonight, are expected to bring four to six inches in the lowlands and more on the hills. What a difference a little bit of moisture makes.

Even thought it's not nearly enough to save us from unprecedented drought -- the current soakings will only bring total rainfall so far to not quite forty percent of normal -- the backyard is a whole new place. How long has it been since there were fat water droplets clinging to the textured surface of the kale leaves? It seems like years.

There is a softness in the air, a new urgency in the song of the birds, and a sweet fragrance from the darkened soil. St. Francis had it right when he praised "Sister Water, so humble and precious and clean."


There is a heightened awareness now, all across California, of every precious drop, gallon, and acre foot. Trying to do my small part, I set out a plastic garbage can in the back yard as an instant rain water cachement system. A few inches have been collected already from the first storm. It's a tiny tiny drop in an extremely large bucket (the whole state and its water deficit) but it works as a consciousness raising gesture.

We are ready for the next storm, and the next.

Sunday, August 21, 2011

Green String Farm


Green String Farm nestles against the leonine flanks of Sonoma Mountain in the southeastern corner of Petaluma. It is just a short drive down the highway, right where Adobe Road takes a sharp curve east through the hills.

I can't remember exactly how I stumbled on this local treasure. It was recently and it was on the Internet, of course, venue for most of my explorations these days.

Searching for something or other about sustainable agriculture I followed a series of links which ended up at a Web site with news of unexpected riches right here in southern Sonoma County. Green String Farm and Green String Institute have been operating for nearly a decade and co-founder Bob Cannard has been an icon of the organic movement -- a famed purveyor of highest quality vegetables and fruits to Alice Waters herself -- for more than thirty years.

This was all totally new to me, local gardener for lo these thirty-four years.

I didn't waste any time in checking out this new-found cornucopia. As it happened they were having an open house so I was able to get the whole story in person.

First off, the farm store deserves a mention. Open throughout the year, summer and winter, every day except major holidays, it offers up heaps of "Beyond Sustainable" produce along with eggs, cheese, and dried and canned items produced on site -- all for affordable prices. Part of the farming philosophy that shapes this enterprise is the intent to grow good food at reasonable cost for local markets. No shipping pricey organic fare for thousands of miles.

Wonderful, I thought, as I wandered through the charmingly rustic open air displays admiring baskets of bright red cherry tomatoes, piles of dark green zucchini, bins of golden peppers: If it's good enough for Chez Panisse, it's good enough for us home folks.


Along with its fabulous food, Green String Farm is also growing a new generation of organic farmers. That's where Green String Institute comes in. The open house was put on by the most recent crop of farm interns: an eager band of young people who had been selected to spend three months living and working on the farm while attending daily lectures by Bob Cannard about his unique approach to farming. The Institute, too, operates year round. There are new groups of interns coming in each season -- summer, fall, winter, spring -- and each group plans and organizes an event for the local community.


So, on a late August Saturday, with the sun beating down out of a cloudless blue sky, I went from booth to booth getting a crash course in "natural process farming." One of the interns demonstrated a very simple set-up for brewing compost tea in a five-gallon bucket full of water. With just a small amount of compost starter suspended like a tea bag, a little molasses, a pinch of flour, an air pump and a bubbler, you can launch an aerobic process for growing lots and lots of micro-nutrients that will give your plants a power diet.


There were other booths describing soil biology and plant health, the importance of adding igneous rock powders to boost soil minerals, and mug shots of all the different types of crucial soil critters. The displays and demonstrations were clearly aimed at encouraging us to try out the Green String methodology in our own gardens. It was like a science fair of smart motivated kids all presenting different aspects of the same experiment.


An intern led a tour up the hill and out into the wide summer fields dotted with fruit trees and patterned with long dark rows of vegetables. We got to see where the cherry tomatoes, zucchini, and peppers had come from.

Our group seemed even more interested in finding out where the interns had come from. The guide, an eighteen-year-old college graduate from Florida, patiently answered lots of personal questions: Are you going to be a farmer? Yes. What are you doing after this program? I'm staying on here to do some research. Are you a brainiac? Hmmm, if you say so. . . . Look over here at this nice field of chard . . . .

Interns come from all over the country (e.g. Florida, Michigan) and from other countries (e.g. Serbia) to spend three months living together in an old farmhouse, planting, tending, and harvesting the crops, running the store, and studying natural process farming as a business as well as a labor of love.

(People, there might be some hope for our common future if the cool careers are now out in the fields rather than on Wall Street.)


Some of the fields looked like what you would expect on a farm. But these were in transition and not fully representative of the "natural process" approach.


A cabbage patch gave a better idea of the technique. It looked like a weed patch, overgrown with tall seeding heads of what is in fact a companion cover crop that will be left to mature in place and eventually die back to form a thatched ground cover.

The field seemed alive, rustling with subtle motion. Suddenly a flock of birds swooped up out of the weeds to swirl and twitter in the air and then settle back down for more feasting on the plentiful seeds. The cabbages seemed almost like an afterthought, tucked in among the natural pasture. The principle is: A crop for the people, a crop for the soil (and the birds, and the insects). This is how Mother Nature does it, with plenty to go around.


A large field of tomatoes was even more striking -- it looked like it was made up of long tidy rows of weeds. You couldn't see the tomatoes at all until you were right on top of them.


The plants were not staked and sprawled along the ground amidst the weeds. The tomatoes will go to the farm store, the weeds will die in place and be dug back into the ground to enrich the soil. The argument is that this approach builds a complete, thriving soil biology which supports healthy plants with complete nutrition and full flavor.


The highlight of the day was listening to Bob Cannard talk about healthy soil and healthy plants. A tall, intense man in well-worn jeans and work boots, he strode into the capacious old barn filled with folding chairs, running his hands through short spiky grey hair. Completely covered with a fine film of dust, he seemed to have materialized out of the earth itself.

"OK, where do you want to start?" Barely waiting for the first tentative question from the group he launched into a long rambling discourse describing the natural processes that build soil wherever Mother Nature has a free hand. It all starts in the mountains with the rushing freshwater streams that gather up particles of rocks, plant debris, animal remains -- whatever is there. The streams bring this rich brew of "mountain tea" down into the flat lands where unencumbered annual flooding spreads it out and deposits the nutrients into the soil. That's the way it used to be everywhere.

But human activity has put streams underground and interfered in thousands of ways with natural soil fertility; so the farmer or gardener has to make up the difference by supplying the missing nutrients. Hence, natural process farming.

With words and ideas tumbling out almost faster than he could articulate them, his talk began to seem like one the roiling bubbling streams he was describing.

Here's a small sample from my scribbled notes, which are cryptic clues to a wholly integrated philosophy I as yet see only pieces of:

Use igneous rock powder from quickly cooled volcanic rock -- has 80 essential elements. Is para-magnetic, not di-magnetic or magnetic, which are low energy. (???) Supplement with calcium, also sulfur, which are lost in steam from hot lava.

Plants are meat eaters, consume bacteria protein, protoplasm.

"Fixed air" is what the plant fixes out of the air into its body, source of carbon. (?)

Too much nitrogen means a plant drunk, on crack -- a weak, sick, fat, "water-body" plant that attracts pests and disease. Natural process farming is very low nitrogen method.

Majority of soil food comes from cover crops. High diversity. (?) Allow them to come to fruition, produce their "seed babies" and die of mature contentment. Over time this develops a unified soil culture.

The gist of it all is that foods grown on soils alive with the full spectrum of nutrients are incredibly tasty and maximally nourishing.

When his time was up, he invited everyone present to stop by the farm store on the way out and pick up a free basket of cherry tomatoes. If there was any chance I hadn't been convinced by the speech, one mouthful of a little bright red cherry bomb of flavor exploding across my palate closed the deal.

What I took away from the day is that natural process farming tries to replicate Mother Nature's own methods of soil replenishment through compost tea, rock powders, and cover crops left to decompose in place.

I can hardly wait to try some of it in my own backyard. Even with no eager interns on hand to do the heavy lifting it can't be terribly arduous to sprinkle compost tea and rock powder on everything and throw out some seeds for cover crops. And, to fill in the gaps for what our yard doesn't manage to produce, it's really good to know that just down the road is an all-year every-day farm stand.

Sunday, August 14, 2011

Grafted Tomatoes: An Update


It's mid-August: time to check in with the experimental, grafted heirloom tomatoes. They have almost caught up with the hybrids, which were set out three weeks earlier (May 9 versus May 29). The Japanese Black Trifele plant is the most robust, vining upwards nearly to the top of the six-foot support poles.


The hybrids, for their part -- one Sungold and two Better Boys -- are filling out their eight-foot support tee-pees and have nearly reached the trellis roof. (And I must say that the tomato-guild assortment of companion plants at their base has done well too, forming a living mulch of basil, parsley, marigolds and nasturtiums that glows with variegated shades of green, orange, and yellow in the bright summer light.)


If all the pear-shaped fruit hanging on the Black Trifele plant ripens, we will have the best harvest ever of this smokey-flavored heirloom tomato with its rich, buttery texture. That alone would make the experiment worth the extra cost and effort!


Although there are some minor dead spots along the edges of a few lower leaves, so far this Black Trifele is the most successful heirloom we have grown.


The San Marzano Gigante 3, an Italian paste tomato with a portentous name, is also doing just fine, thank you -- festooned with long, pointed fruit, some of them almost as gigante as my hand.


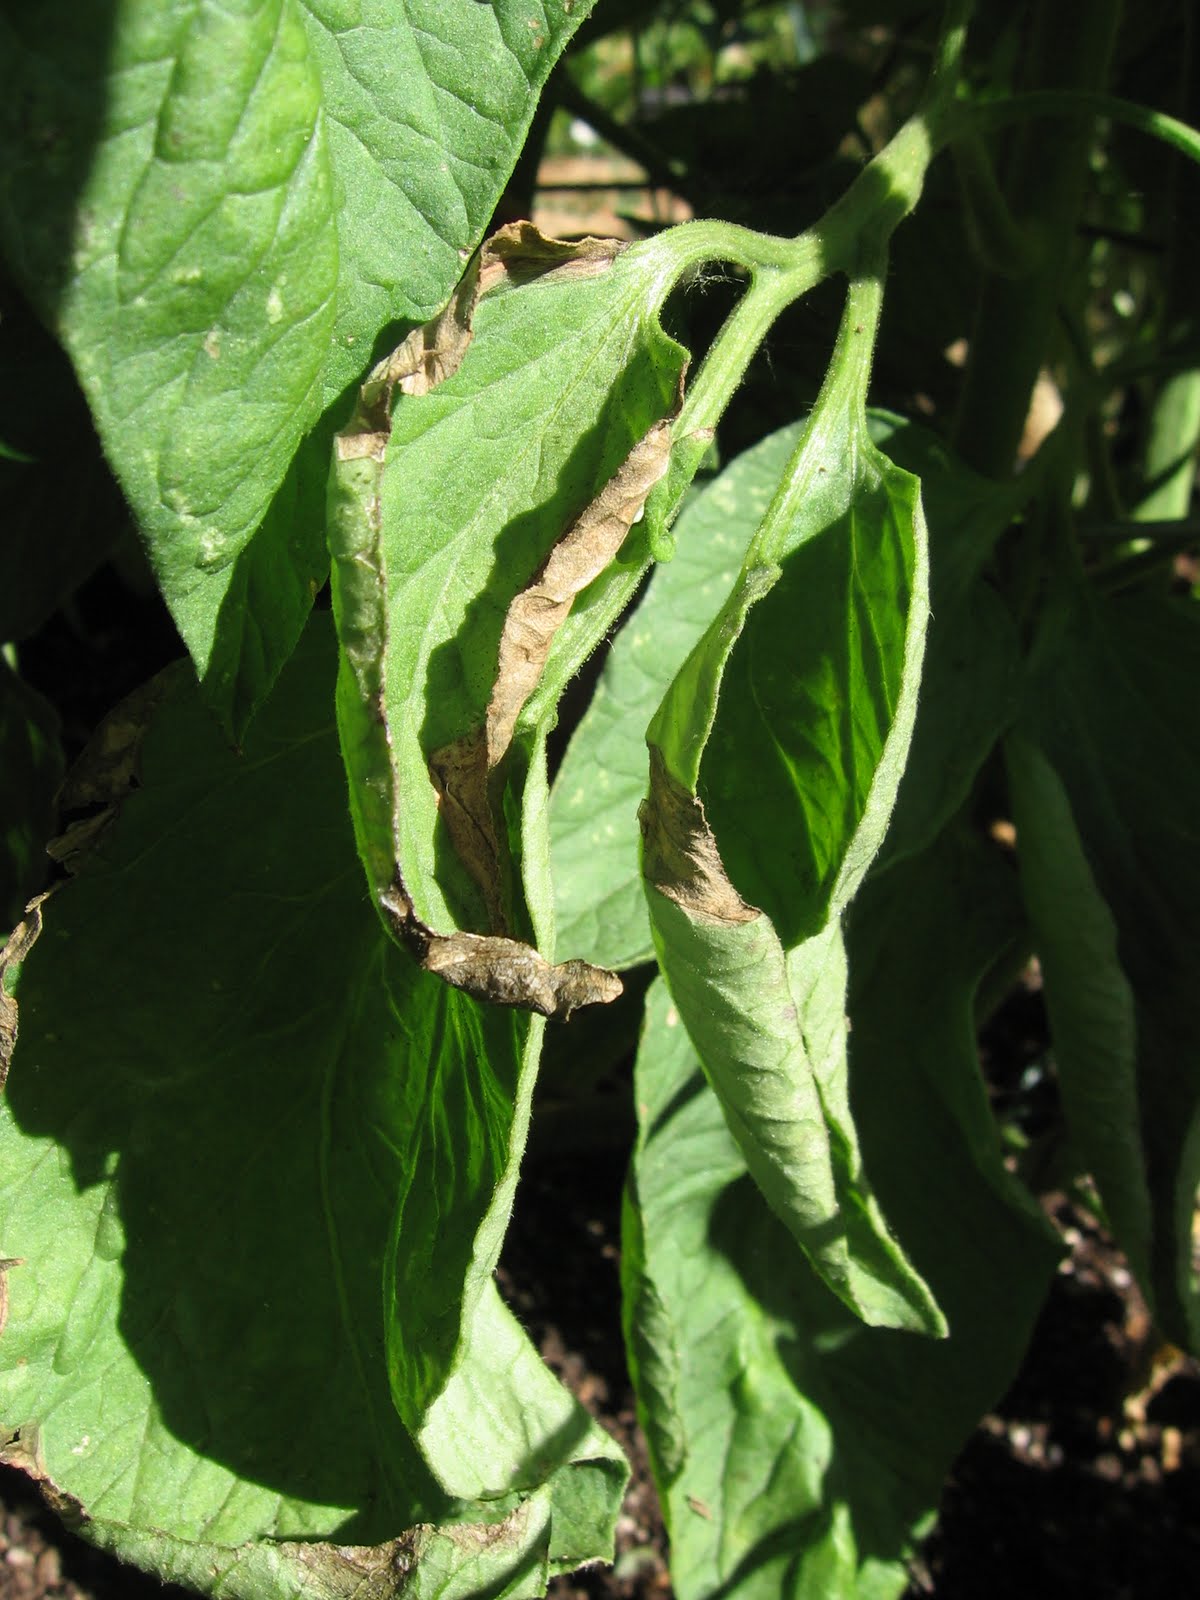
The lower San Marzano leaves have a fair amount of the brown spots along the edges that appear sooner or later on all the tomato plants we have ever tried to grow in this garden. Eventually the whole leaf turns brown and shrivels up. So far it's hardly noticable unless you peer worriedly into the tangle of marigolds, basil, etc., at the base of the plant -- which of course I do constantly.


Big Beef is also looking good with clusters of mid-size green fruit. This is one of the varieties being tested by Amy Stewart of Garden Rant, and other garden bloggers as well, in controlled trials matching the performance of grafted versus non-grafted versions of the same variety. The preliminary results seem to be encouraging overall, although Amy's right in wanting to wait for the actual eating of the harvest as the last and final measure of success.


Meanwhile, I continue to peer anxiously at browning leaves, my personal measure of tomato perfection or lack thereof. The Big Beef plant has some dead branches but they are at the base and don't seem to be spreading upward in any great hurry.


Brandywine is another story. There are just a few small fruits on a stunted plant that has stopped growing at about three feet in height.


Whole branches are dying off completely. It started on the larger, upper leaves, some of which turned brown all at once and then shriveled. No slow spotting on the edges of lower leaves. No need to peer into the undergrowth. It's a major problem right out in the open. I've never seen this before and I sure hope it isn't contagious! I will remove the whole plant and hope for the best.

Three out of four ain't bad.

Sunday, August 7, 2011

Seed-Saving for Dummies


In the backyard, tall tufted wands of lettuce seed stalks are waving in the August breezes. The Bronze Arrow plants, a highly touted American heirloom oak leaf variety, were grown from seeds saved in the autumn of 2010. Out of several varieties, these are the most prolific: luxuriant with seeds ready to take off on their little white parachutes. I have been cutting off the puffy tops and dropping them into a brown paper shopping bag labeled with as much information as possible: collection date, variety, source (i.e. grown from saved seed, purchased seed, or nursery starts).

I used to happily collect seeds from whatever plants in the garden made it through their full life cycle. Then, as I learned more, it became clear that not all seeds are created equal.

The biggest factor for a backyard gardener to be aware of is that some plants are inbreeding and self-pollinating. They don't rely on bees or insects and don't need pollen from other plants. Everything happens right at home in self-contained flowers on a single plant. These are the garden introverts: lettuce, peas, beans, and tomatoes are examples. They have "perfect" flowers, meaning they possess both male and female structures in the same blossoms on the same plant. The blossoms of peas and beans are often pollinated from within before they even open because the stigma (pollen receiving structure) and anthers (pollen producing) are very close together and mature at the same time. Inbreeding plants evidently have the remarkable ability to produce vigorous offspring generation after generation without outside infusions of genetic material.

The garden extroverts -- such as chard, broccoli, and zucchini -- are outbreeding and cross-pollinating. They like to attract insects to carry their pollen around and fertilize the nearby blossoms of plants in the same species. Beet pollen will fertilize chard blossoms and vice versus. Different varieties of broccoli will gleefully co-mingle, as will zucchini. (Now I understand why my carefully gathered Romanesco broccoli seeds gave rise to plants which sported odd, purplish, lumpy heads instead of the gorgeous lime-green, laser-sharp, Fibonacci-spiraled heads I was expecting. Purple sprouting broccoli, I'm looking at you! These cross-bred plants had the less desirable features of both parents -- very few side shoots and small shapeless heads).

Inbreeding seeds, on the other hand, left to themselves (as they prefer) are likely to produce a plant that resembles its parent -- because it usually has only one parent. They breed true.

I have now realized that I am a complete neophyte at understanding the mysteries of plant genetics and will simplify my seed-saving habits, sticking with the easiest, most predictable types, such as lettuce.


Still, there are complications, even at the beginner level of seed-saving. It's important to make sure that the seeds you are gathering come from non-hybrid plants. Hybrids are new varieties created by combining two plant lines with distinct features into one line that joins the best of both. Hybrid plants grow well, but, even if self-pollinating, they produce seeds that revert to the separate, less desirable features of the parents. If you grow hybrids, there's no point in saving the seeds; you have to keep buying the seeds or seedlings to keep the defining characteristics. (Often, it's well worth it: the fabulous Sungold tomato, for instance.)

Fortunately, it seems like most of the lettuce seedlings I pick up at the local nurseries happen to be non-hybrid heirlooms.

Australian Yellow is a tasty heirloom with crinkled, chartreuse leaves. The seedlings were part of an All-Star mix from Cottage Garden nursery. These seed stalks, despite being chomped by deer, have grown back and are almost ready to be harvested.


The Garrison lettuce -- a dark-red oak leaf variety grown for its attractive baby leaves which are a popular addition to mesclun mixes -- also came from Cottage Gardens. These seed stalks, too, were chewed down by deer. They are still in the blooming stage.

There's plenty of material here for further adventures in seed-saving, even for beginners.

*******************************************


Sources of information used in this post:

Daughter of the Soil
http://daughterofthesoil.blogspot.com/2006/07/f1-hybrids-what-every-gardener-should.html

Seed Savers Exchange
http://www.seedsavers.org/Content.aspx?src=helpfullinks.htm

International Seed Saving Institute
http://www.seedsave.org/issi/issi.html


Friday, July 1, 2011

Grafted Tomatoes: An Experiment


Grafted tomatoes? Grafted fruit trees make sense, of course, because they last for decades. But why go to the trouble of joining a vigorous, disease-resistant rootstock to the delicate stem of a coveted variety in an annual that will be pulled up after a few brief months? In the photo above you can see the join where two different tomato plants, rootstock and scion -- the top part -- have been painstakingly bonded together through a lengthy process which requires highly specialized growing conditions.

This approach might make more sense than seems evident at first. Grafted vegetables of all types are common in Europe and Asia and are in use among commercial growers in this country. There are notable advantages to strong, healthy, high-yielding plants that can adapt to changing weather and produce lots of the tender heirloom veggies we love to eat.

I first learned all these fun facts about grafted tomatoes last summer from Amy Stewart of the seminal, rabble-rousing blog Garden Rant. It was too late in the season to do anything more than scour the internet for additional information and vow to track some down for 2011.

Our particular Sonoma County micro-climate allows for growing good tomatoes. However, our particular backyard has boggy black clay soil which is very fertile but doesn't drain well and harbors disease. Tomatoes seem especially susceptible. Every year our plants are gradually afflicted with thick curled leaves marked with brown spots. The process starts with the bottom leaves and works slowly upward. It never reaches more than a third of the way up, doesn't kill the plant, and we pick plenty of tomatoes, but it's sooooooo discouraging to watch helplessly as it climbs inexorably, leaving dead branches behind. It affects heirlooms most but doesn't spare the hybrids and doesn't seem to be controlled by rotating the beds each year.

So, when the Territorial Seeds catalog arrived earlier this year from Oregon, with -- surprise! -- a page full of tempting grafted varieties, I ordered six plants, admittedly a bit of a splurge, because the grafted seedlings are about twice as much as regular vegetable starts. Like most backyard tomato growers, I lose judgment when rainbow visions of green vines heavy with jewel-toned heirlooms float before my eyes.

Due to this spring's prolonged chilly, wet weather on the West coast, the plants arrived a couple of weeks later than planned and did not look very good when they got here. All of them were spindly with pale stems and curled, pale leaves; a couple had grown too tall for the shipping box and were broken off at the top. Dilemma: should I send them back and call off the experiment? No. Why wait another whole year to make the trial?

Now I'm grateful to myself for the decision to forge blindly ahead.


I planted out four seedlings and gave two away to a good home. The Brandywine and Japanese Black Trifele pictured above went into the ground on May 29.


Here they are today, a month later. Looking good!


Here are Big Beef (on the left) and San Marzano Gigante 3, planted out at the same time. All of the grafted tomatoes are now about two feet tall and thriving. My friend who took in my two leftover seedlings says his little foundlings are doing just fine.

The grafted tomatoes are running behind our other tomatoes planted on May 9, three weeks earlier: two Better Boy hybrids from Garden Crossings mail order nursery in Michigan (the only place we could find our tried and true favorite workhorse tomato), and the can't-do-without organic Sungold (an F1 hybrid) from our local Sonoma County mail order nursery, Natural Gardening. These "control" plants are now about four feet tall with flowers on both varieties and tiny first fruits on the Sungold. They are also showing the first tell-tale signs of leaf thickening and curling, with accompanying brown spots, just a few here and there on lower leaves.

It's a pretty informal, haphazard experiment. Fortunately, others are conducting much more organized trials.

Amy Stewart is back with an account of a sponsored test she is running in her yard. The wholesale nursery Log House Plants sent her a grafted Big Beef and a non-grafted version. They are set up in identical containers, ready for the grow-off.

I will be following her reports with interest, and watching what happens in my own yard.

Monday, May 23, 2011

Tomato Guild


The permaculture concept of planting in communities or "guilds" has intrigued me ever since I first learned about it. Today I put together a permaculture-for-dummies installation including tomatoes (the tomatoes were already there) and a few of the beneficial companions said to enhance their growth: marigolds, basil, parsley, and nasturtiums. Whether the purported mutual benefits are science or merely lore, I do not know, but it makes an attractive grouping and I look forward to seeing how it fills out.

Here are the members of this guild, nestled together in a nine-foot-square raised bed:

1. Better Boy hybrid seedlings from Garden Crossing mail order nursery (Better Boys, B.'s favorite, are getting harder and harder to find. This is the first time we had to resort to online shopping to locate some.) The tomatoes are the lead plant in the guild. These were planted out May 9.

2. Queen Sophia marigold seedlings from Natural Gardening. The roots deter nematodes.

3. Genovese basil seedlings from Natural Gardening. Who could imagine tomatoes without basil! It's said to improve flavor not just in the kitchen but in the garden too. The flowers attract beneficial insects. It's edible. Being pesto lovers, we grow it as a crop in its own right. B.'s most frequent comment on the garden: "Not enough basil!"

4. Italian Flatleaf parsley seedlings from Natural Gardening. I'm not sure what parsley does but it's always on the guild lists for tomatoes. Edible.

5. Moonlight nasturtium seeds from Renee's Garden. Nasturtiums deter pests, draw beneficial insects, and are edible.

As I understand it, a true guild is based on perennials and ideally starts with trees, but hey, you garden with the plants you have, with the materials at hand, and with the time available. I've discovered that the best way to learn new things in the garden is to start some small scale experiments and see where they lead.

Tucked in with all the seedlings and seeds in this bed are two sunken clay pots filled with water and covered with the pot's own drip dish turned upside down to form a lid. This was an experiment from several year's back that has yielded good results. The pots provide a steady water supply close to the root zone as the water slowly seeps through the clay walls, responding to the moisture level in the surrounding soil. I think the plants like this system because when I pull the pots out at the end of the season the hole is lined with a thick netting of pale roots.

Here's hoping this tomato installation becomes a happy little cul de sac in the larger garden community.

Saturday, March 19, 2011

Kale Chips?


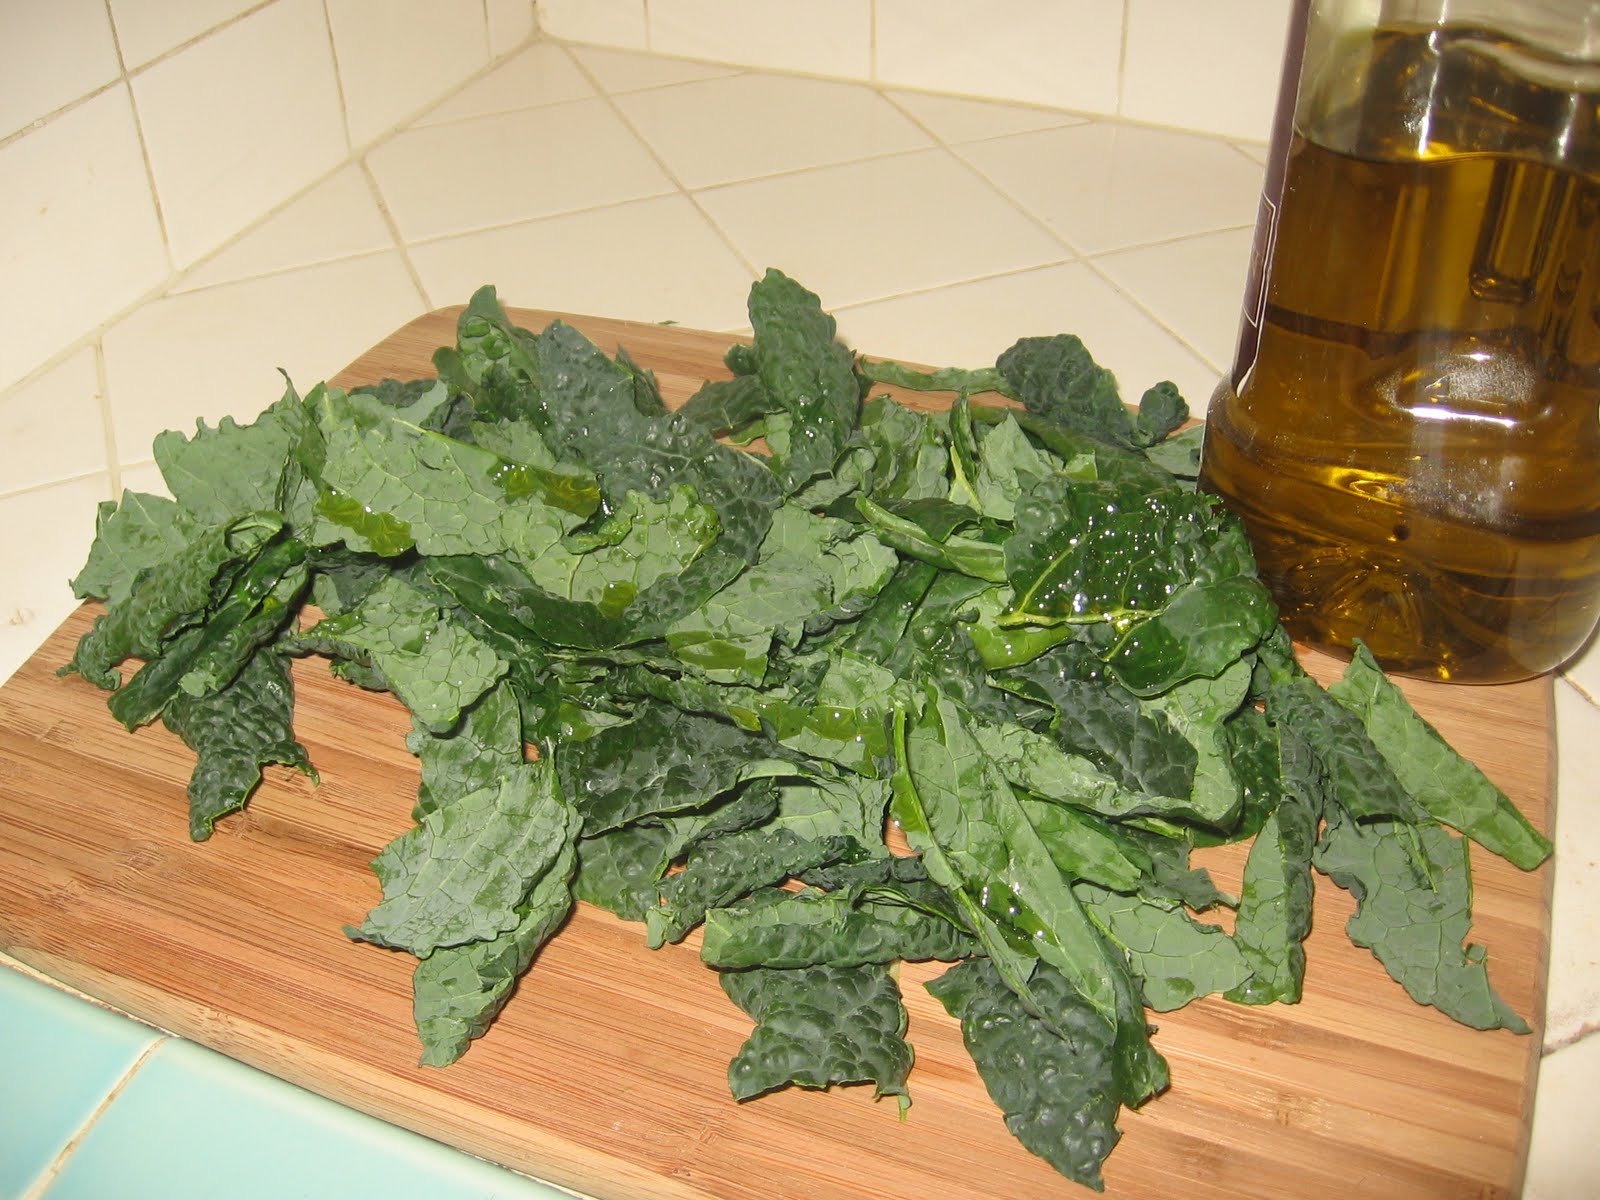
Am I the last one to hear about these? Have they entered the mainstream while I wasn't paying attention? Are they being sold at ballparks? Kale chips are really, really good: light, crunchy, oven-dried flakes of flavor. And so easy to make.

I first learned about them from a friend who was visiting the garden. Noticing the rather spindly stand of dinosaur kale (also known as Tuscan kale, lacinato kale, black kale, etc., etc.) she asked if I had ever made chips. When she described the simple process I resolved to try it out.


First, of course, you get your hands on some kale. (Any kind will do.) I gathered a big bunch and washed it carefully, checking for earwigs, tiny slugs, aphids -- the usual routine of the organic gardener.


A brief whirl in the salad spinner takes excess water off fast.


Stripping the leaves from the thick stem and central rib goes fast too. Pick up a leaf, hold the stem end firmly in your right hand (if you are right-handed), grasp the base of the leaf lightly with your left hand, then pull hard with your right hand. The leaf should rip right off. If some of the leaves border the stem all the way down to the base -- common for dinosaur kale -- just peel the two sides back a bit and proceed as described.


Now you have a nice pile of dark green ribbons. Cut them into smaller pieces.


Drizzle some good olive oil over the pile.


Put it all in a brown paper bag and shake gently until all the pieces are lightly coated with oil.


Coat a cookie sheet with oil and arrange the kale pieces in the pan in a single layer.


Grate up some fresh parmesan cheese and sprinkle lightly over the kale pieces.

Put the pan in a slow oven for 10 to 15 minutes. It might take some experimentation to get the temperature and timing right. I followed an online recipe that asked for 15 minutes at 375, which turned out to be too long and too hot. I pulled the pan out after seven minutes because some of the pieces were clearly overcooked and turning an unappetizing color. Nonetheless, they were crackly and delicious.

If you want to hear how crunchy kale chips can be, take a look at this charming video at katheats.com. Kath used a different type of kale and a slightly different approach but the general idea is the same:

http://www.katheats.com/favorite-foods/kale-chips

"Eat your greens" has a whole new meaning.

UPDATE 5/19/11: OK, today is May 19. I was cleaning out the refrigerator and way at the back of a bottom shelf found the container of kale chips with a few left at the bottom. Two months later they are still crunchy and still tasty. Is this a way to preserve the crop?

Sunday, February 6, 2011

Lasagna Gardening: Gourmet Version


Although the winter garden has served us well, the plants aren't as large and sturdy as in previous years. Case in point: the rather spindly Bronze Arrow and Black Seeded Simpson lettuces pictured above. The vigorous volunteer Forget-me-not seedlings are taking over the bed.

The soil in all the beds is overworked, I think, because as soon as one crop comes out another goes in. I do add organic matter whenever possible but, clearly, it's not keeping up with the demand. What to do? Although there are now enough beds to let some go fallow and pile them with mulch for a season or two, I don't seem to be able to make time for that forward-looking task: the immediate gratification of planting and harvesting gets in the way.

Solution: lasagna gardening. As I understand it, this approach involves building what amounts to a mini-compost pile of layered materials -- hence lasagna -- with soil on top like a very thick layer of Parmesan cheese. The claim is that the plants grow just fine even as the various layers are slowly breaking down and enriching the soil.

It's certainly worth a try. Maybe it's the perfect way to have our vegetables and eat them too -- to build soil and grow plants all in one smooth operation, just the way Mother Nature does it. And there is the immediate gratification of planting right away.


So today I ventured out to the yard to turn one of the garden beds into a yummy casserole of nutrients for the hungry roots of some lettuce seedlings from Cottage Gardens.

The hardest part -- which required violating my no-dig philosophy in order to get a quick fix to the problem of declining fertility -- was removing all the old, overworked soil. Once that was taken care of, after lots of little weeding breaks to rest my aging lumbar vertebrae, the rest was fun. All it took was layering in the best ingredients I could find to make up a real gourmet masterpiece.

The first layer was some hand-selected, carefully-aged sections of newspaper gently moistened with the hose. It was not too thick, just one or two sections worth of newsprint. The worms love this stuff, so I hope the newspaper will draw them to the area and get them interested in turning all the undigested organic matter into the top grade soil amendment only they can create.


The second layer was an inch or two of well-aged, locally-sourced manure from Pt. Reyes Compost, self-styled "purveyors of premium poop." The version I used is cheekily called "Double Doody," a mixture of cow and horse droppings, and the bag is marked by an image, half cow, half horse that reminds me of the two-headed Pushmi-pullyu creature from the Dr. Doolittle stories.


The third layer was thick pads of organic alfalfa hay, sprinkled with some high quality general purpose organic fertilizer (Whitney Farms Tomato & Vegetable Food, with a 4-5-3 balance of nitrogen, phosphate, and potash).


Next came a layer of leaves, also locally sourced (just down the block) and organically grown. This layer, too, was dusted with fertilizer. In fact, all the layers were, starting with the bare dirt before the newspapers were laid down.


The last layer was shovelfuls of the original dirt from the bed. There was room for more than half of it to fit back in, so there should be plenty of room for the lettuce to take hold, right on top of the gourmet lasagna layers. I soaked the whole assemblage thoroughly and let it mellow a bit.


It was nice to find a fair number of earthworms in the soil. I sure hope some red wiggler worms will show up to start digesting the layers of organic matter.


The last step was to set in the lettuce seedlings -- Forellenschluss and Garrison. Hope you like my casserole, little guys. Enjoy!

Friday, January 14, 2011

Give Peas a Chance


Here's the harvest from the experimental patch of Caseload Shelling Peas planted way back in mid-September, last fall. They have soldiered through wintry winds, pounding rains, and freezing nights, made the most of some unseasonable warmth lately, and bravely put forth these plump, albeit bedraggled pods.


According to The Natural Gardening Company, source of the seeds, these peas grow to two and a half feet in height and don't need staking. That has not been my experience! These babies are pushing five feet and the stakes are getting higher, so to speak.

The experiment last fall was to see whether my gathered seeds, more adapted to this yard, would perform better than the leftover seeds in the original packet from Natural Gardening. At first it looked like the gathered seeds were doing better; but now it's hard to see much difference between the two rows, and the small differences could be accounted for by more sunlight falling on the row in front. Nonetheless, I count the experiment a great success because it has resulted in a harvest.

My previous efforts to grow many different varieties of peas have been routinely unsuccessful. Mostly, they never came up at all or got chomped as soon as the first tender shoots appeared. I kept planting them anyway because it's so easy and fun to poke the pretty little green baubles into the ground and because they are a marvelous plant at all stages.

The small harvest of Caseload Shelling Peas last August was a breakthrough. And here we have a second one! So now I'm really hooked.


This January harvest yielded a scant half cup and some of the peas were scarred with traces of frost burn. But who's complaining? It was enough to build a dinner on.


Admittedly, the peas are mere tokens in this serving of Peas Alfredo, kind of like the stone in stone soup. But the meal was delicious. Maybe it's not the peas I'm so fond of but the noodles in cream sauce that the peas are an excuse for making! Anyway, it's time to start thinking about the next crop. Should it be this tried and true, field-tested variety or something new and different?